How to Use a Clay Bar for Car paint surface.
Claying a car can be one of the most important steps when fully decontaminating your paint. Throughout this article I will be looking at how to use a clay bar on your car paint surface, and most importantly, safe practices with said clay bar.
If you’re meticulous about cleaning and detailing cars, I’m sure you’ve probably heard of the marvelous benefits of using a clay bar.
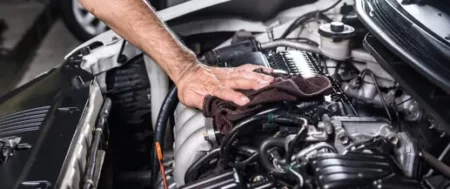
As the vehicle is driven and exposed to all sorts of road contaminants and harsh weather conditions, the paint will eventually get dirty. No, I’m not talking about simple mud or dirt that can be removed by washing, but instead the kind of dirt that is embedded deep in the clear coat. The ones that are practically invisible to the naked eye.
Want proof? Run your clean hands over the hood or roof of your vehicle after washing with water and car shampoo. Use your palms and fingers to feel the paint surface.
Did the surface feel rough?
That’s a sign the paint needs to be treated with a clay bar before applying polish or wax. Remember that fresh and clean paint should feel smooth to the touch. As Meguiar’s puts it, the paint should feel as smooth as glass like it just rolled off the factory.
Now, if the paint only feels slightly rough (and accompanied by ugly swirl marks, which are most evident on dark paint), using decontamination products such as fallout remover and glue/tar remover might do the trick.

But if the surface of the paint has a coarse consistency, even after using decontaminates, you should definitely consider using a clay bar.
What is a clay bar?
A clay bar is a detailing tool that removes deep-seated contaminants in automotive paint. I’m talking about dirt and contaminants that cannot be removed (possibly even seen, but definitely felt) by washing alone.
Clay bar or auto detailing clay is manufactured from a blend of resin compounds. Depending on the brand, a clay bar can be natural or synthetic. However, most commercially-available clay kits are manufactured from synthetic resin.
Think of it like Play-Doh or the type of clay you played with as a child, although automotive detailing clay is firmer and more elastic. It needs to be more durable than ordinary clay to withstand repeated smashing, kneading, and rolling.
The elastic and ‘sticky’ consistency of clay bars makes them the easiest and cheapest way to pull out brake dust, rail dust, asphalt, industrial fallout, and deep-seated grime on the paint surface. The presence of such contaminants is the reason why ‘dirty’ paint feels rough to the touch.
As the clay glides over the paint, it can quickly absorb or pick-up dirt and contaminants. The result is a smooth and glossy finish with a deeper color. Polish and wax can go a long way, but nothing beats the look (or feel) of freshly clayed paint.

Best Clay Bar – Gyeon Clay Bar.
There are different grades of clay bars that are on offer. You can get the cheap knockoff products that are imported in from China that may as well be plasticine, or you can spend a couple of quid more to get a good quality one.
I like to use Gyeon’s clay bar, a worldwide known car detailing products company, so you know it’s at least got some pedigree with it. But, I know that Gyeon has invested a boatload into research amd development just for their clay bar products, which is why I really trust them to offer a good product.
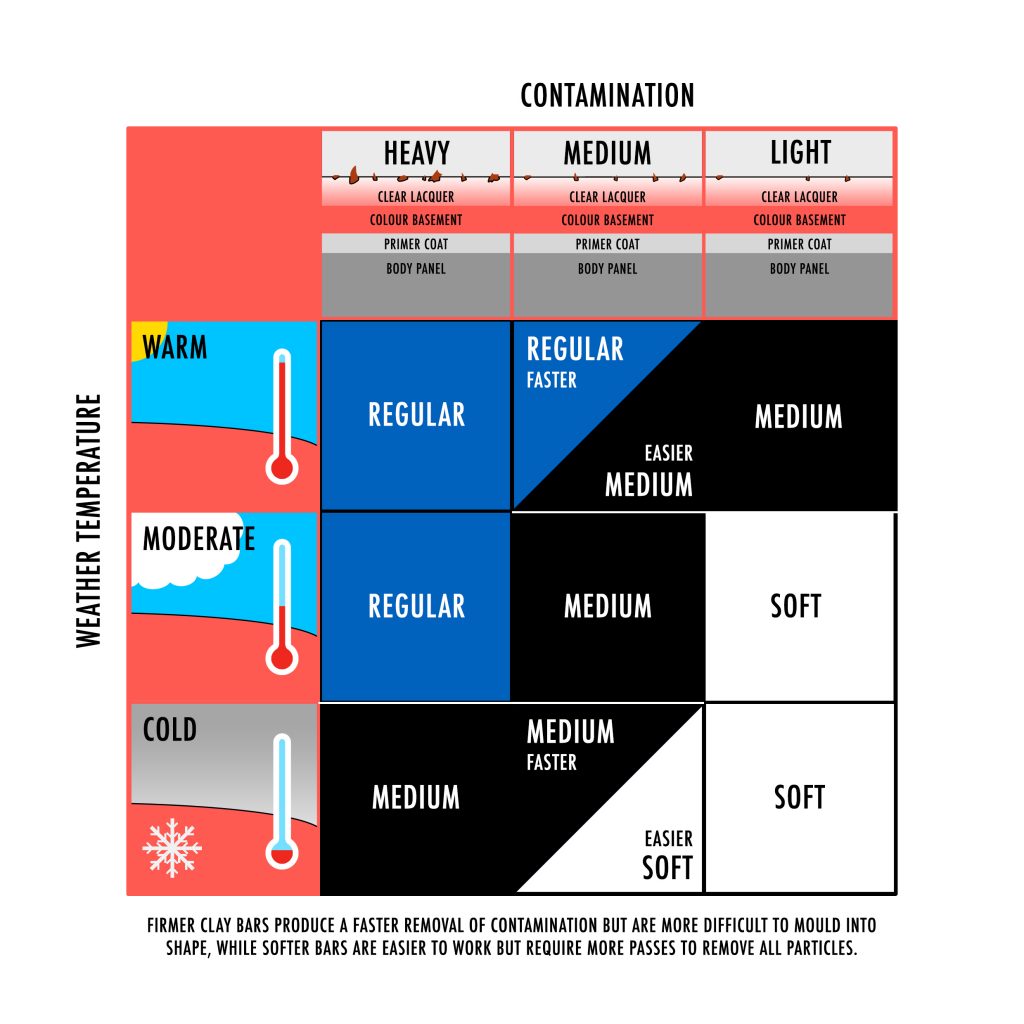
The clay bar comes in regular (moderate/heavy contamination, medium (all-round) and soft (summer use, more frequent use), so you can choose which is best for your car.
How to Use a Clay Bar
In this section of the article, I will discuss the two different processes in how to use a clay bar. The only difference is that of the lubricant.
So, what is clay lubricant?
If you’re planning to use a clay bar, you need to have clay lubricant. You don’t simply wipe the paint with dry clay and expect to see great results. Rubbing a dry paint surface with a dry clay bar will do more harm than good. Doing so will aggravate the finish and leave ugly swirl marks or worse, deep scratches.
The truth is that clean water isn’t enough to act as a lubricant. Water on its own doesn’t offer the clay enough lubrication for the clay bar to safely move over your cars paint. That’s why we recommend that you use a clay lubricant.
Those products will usually come in a spray bottle for easy dispensing. If you’re going to use clean water, then at the very least it needs to be mixed with your car shampoo, but these provide their own problems as well, more which I talk about later in the article.
Process: Clay Bar and Clay Lubricant
Assessment.
Like all detailing assignments, you’re going to need to assess the car’s paint.
For newer cars, there is a good chance that you won’t need to clay the whole car. But, for older cars that have gone longer periods of time between their last clay or even their first clay, then it’s likely you will need to do the whole car.
An easy way is to simply use your hand. Get the car washed and feel how coarse the paint is. You can even put your hand in a small food bag to get a better glide and feel.
Phase 1:
Wash and dry the vehicle thoroughly.
If you’re working on a newer car, you can choose to clay the rougher sections without treating the entire vehicle. But if you have an older car, you’ll most probably need to treat the entire vehicle to achieve the best results.
Of course, it is always best to park the car in a safe, level, and shaded area. After washing, rinsing, and drying the paint, it is best to spend a couple of moments to inspect the condition of the paint.
Like I mentioned earlier, now is the perfect time to rub your clean hand over the sections of the paint. If you feel a lot of rough spots in the paint, the section will benefit mostly from a clay bar.
But if you find larger contaminants such as tar or asphalt, it is best to remove them first using a separate tar remover or asphalt cleaner. It’s always best to use as many products as possible to remove decontaminates which then results in less time actually touching the paint. This will make claying a lot easier.
After doing so, make sure to wipe the surface dry and give a final inspection.
Phase 2:
Prepare to clay the vehicle.
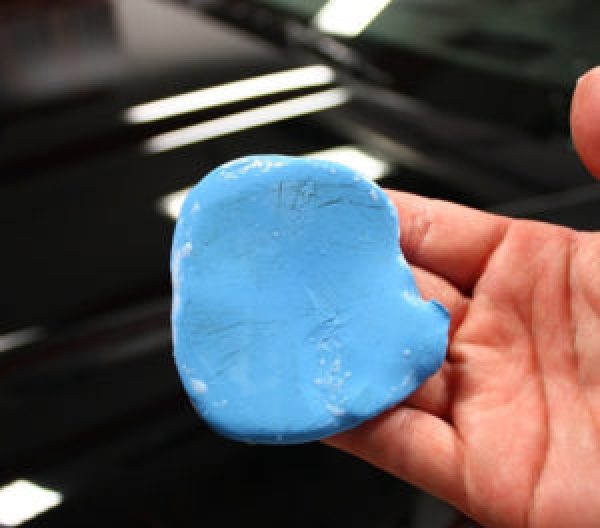
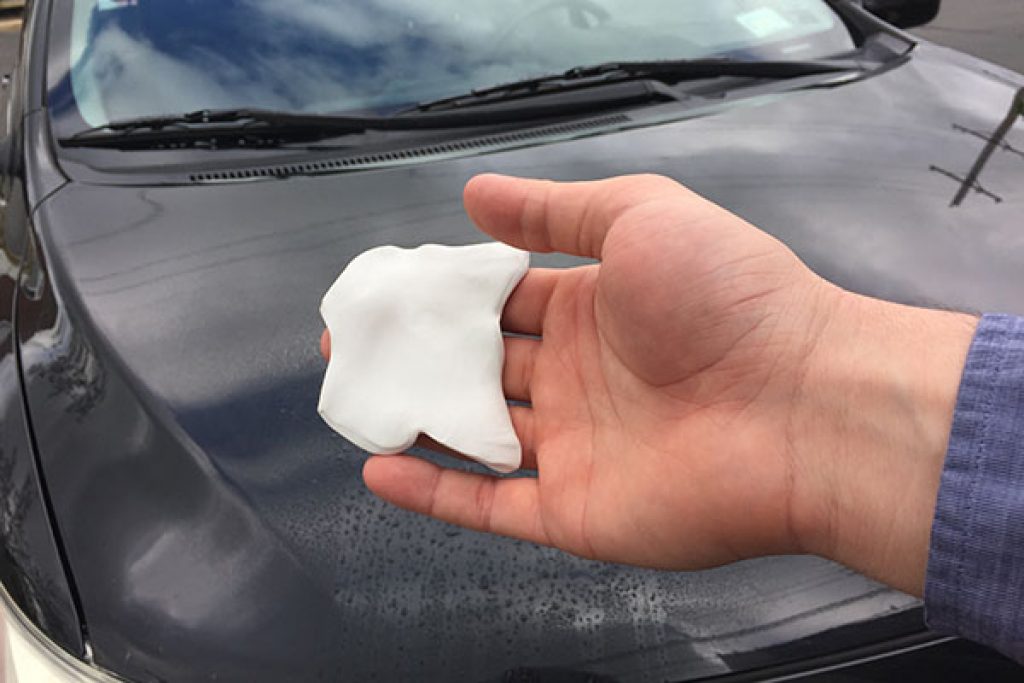
Grab the clay bar and divide it into sections about the same size as a mini Mars Bar.
Remember that automotive detailing clay is tougher and firmer than ordinary clay. You might need to literally cut the clay in half using a small cutting tool or putty knife.
After cutting the clay, knead the clay in the shape of a small burger, one that is large enough to fit in your hand. Flatten the clay in a hamburger-like shape before proceeding.
Phase 3:
Work with a single section of the vehicle at a time.
It is advisable to start with the upper part of the vehicle (the bonnet, roof, and the boot) before treating the doors and the lower parts of the vehicle. This will prevent scratching and marring the good portions with dirt and contaminants that were picked-up from the lower parts of the vehicle, which are usually most heavily soiled.
After kneading the clay in the shape of a burger patty, liberally spray clay lube on the clay until wet. Next, spray a liberal amount of the clay lube on the paint. Gently wipe the wet surface with the clay using a left-to-right or up-and-down motion, but never in a circular motion.
I like to call it the “Hashtag Technique“.
You will feel or even hear the contaminants on the surface. You know when it’s done when there is no resistance when moving the clay bar.
It’s worth noting that you don’t need to apply a lot of pressure on to the paint. The clay will do the work for you.
Phase 4:
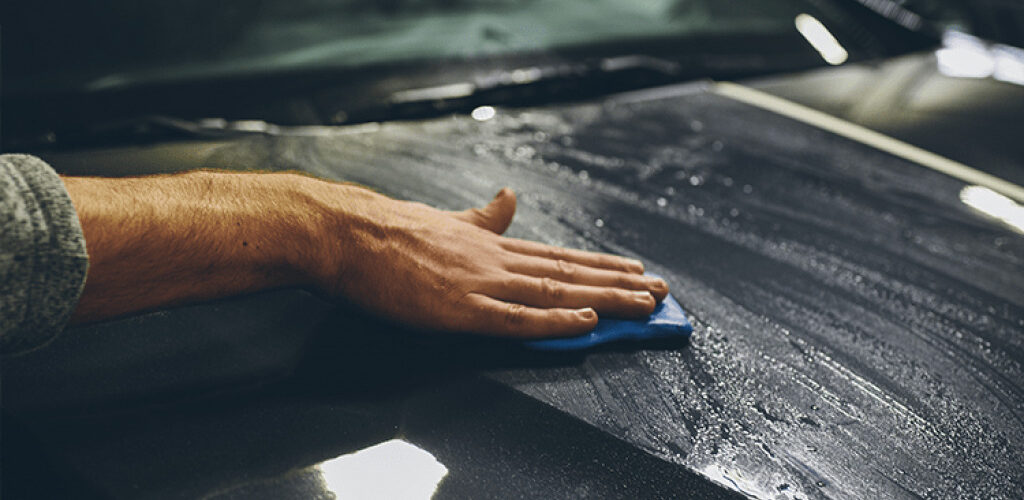
After wiping the surface with clay, grab a clean/dry microfiber towel and wipe the surface gently to remove the lube. Turn the towel over and give the paint a quick buff. You will instantly notice the paint will be smoother, shinier, and cleaner than before.
Check the underside of the clay bar. You will see all the dirt and debris lifted from the paint!
Phase 5:
Knead the clay once more to reveal a fresh surface. I like to twist and fold, almost as if you were wringing a towel.
If you drop the clay to the floor by accident, discard it immediately. It may have absorbed larger portions of dirt and grit on the floor, which will only serve to damage or scratch the paint.
Phase 6:
Repeat the steps above until the entire vehicle is treated with the clay bar.
Clay Bar and Car Wash Solution:
If you don’t have clay lubricant, you can use plain water with your car shampoo. Like I previously mentioned above, all you need for this technique is a clay bar and a small spray bottle filled with clean water and shampoo, or simply slosh on using a clean wash mitt.
But if you have liquid car shampoo, simply mix a capful of the shampoo in a small bucket of clean water. The foamy consistency of this cleaning solution is also ideal for use as clay lubricant.
Phase 1
Knead the clay and spray with clean shampoo mixture until wet. Spray more shampoo mixture on the paint surface and work the clay using a left-right or up-down motion.
If using car shampoo, grab a microfiber wash mitt, dip it in the cleaning solution, and wipe the wash mitt gently over the paint. Dunk the clay in the cleaning solution and proceed to gently wipe the clay on the paint.
Whether using water or car shampoo, make sure the area is sufficiently wet or lubricated before wiping the clay over the finish.
Phase 2:
If using plain water or car shampoo as clay lube, there is no need to wipe the surface dry with a microfiber towel after cleaning each section. Simply rub your hand over the wet surface to check for rough spots you might have missed.
By now, the clay will be dirty and filled with dirt and contaminants. Knead the clay again to reveal a fresh portion and proceed to clay the entire vehicle using the steps above.
Phase 3:
Once done, give the car a final rinse using a pressure washer. Wipe the surface dry using a microfiber drying towel.
So, I’ve just explained how to use car shampoo with a clay bar to get contaminants from your paint and now I’m saying why not to use this method.
Confused? Well, you’ve every right.
With all parts of detailing there’s often several ways to skin said cat. Larry form Ammo NYC and one of the most respected guys in the business uses his car soap and a clay bar. If it’s good enough for him, then it has to be good enough for most, right?
Well, I thought the same, but the problem with car shampoo is that it doesn’t have nearly good enough lubrication levels for what we need to safely use clay. Also, car shampoo dries very quickly, which means we are moving particles around over the surface of the car.
If you worked in small spaces and rinsed thoroughly quickly after using, then maybe car shampoo could work. But, why bother take the risk?
Get a decent clay lube, and not have to worry about damaging your paint.
Which is better: clay bar or clay mitt?
I guess the answer will depend on your preference. The main difference between the two is the size of the product. Clay bars are smaller and will need to be kneaded into shape. On the other hand, clay mitts are larger and can fit in the palm of your hand, which makes them easier to use.
Due to the difference in size, clay mitts have a tendency to last longer than clay bars. And if you drop a clay bar, you’ll need to throw it in the trash. But if you drop a clay mitt on the ground, it only needs to be rinsed with clean water and its ready to go once more.
But for me, I like using an ordinary clay bar if the paint is excessively rough or dirty. The next time I decide to clay the vehicle (maybe after a month or two), I grab a clay mitt to make the job a bit easier.
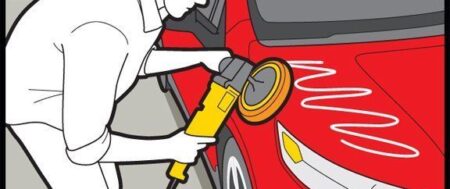
Do I need to wax the paint after using a clay bar?
The professional way of doing it will be to polish and wax the paint after using a clay bar, especially when dealing with dark-coloured paint. Small scratches and swirl marks will be more evident on black or dark paint, and only polish is abrasive enough to remove paint imperfections gently.
Keep in mind that clay bars and waxes are non-abrasive and will not remove or correct deep scratches and swirls. However, a freshly ‘clayed’ surface will be smoother and cleaner, which will make it many times easier to polish and wax the paint.
But if you’re working on a vehicle with white or light-coloured paint, applying a simple coat of wax is enough to seal the paint and give it a nice, even shine.
Important notes about how to use a clay bar
The step by step guides above are designed to show you exactly how to use your clay bar. But, like all things to do with detailing, there are a few points that I wanted to make before you set away on your pride and joy that you need to consider.
Thoroughly wash your car
Your car needs to be gleaming and totally free from dirt before you start any claying. The clay bar isn’t designed to move dirt from the car, it’s designed to move imbedded contaminants.
A good trick that I like to do is just to simply wash it twice. So, I will wash the car, pressure wash it down, then wash it again, before decontamination or drying.
Pay close attention to that of the lower parts of the car, especially front bumper, boot and behind the wheels, which are high traffic areas.
Use decontaminates
Make sure that you use the full array of decontaminates before you clay. This includes:
- Fallout remover
* Iron Remover - Tar remover
- Glue remover
We need to get as much junk off the paint as possible and by doing without actually touching the paint is an added bonus.
Also, it’s worth doing an assessment after you have used these products as it may turn out that you don’t need to then clay your car, which would be a bonus.
Different levels of coarseness in clay
Just like sandpaper, clay can come in different levels of coarseness and this is something that you need to be aware of. As the level of coarseness increases, so does the level of abrasion and in turn, the amount of damage that you can do.
Personally, I like to go for fairly mild clays over aggressive clays. If I need more, I can always up the aggression of the clay, but it’s going to be much harder to correct mistakes if I don’t do this first.
The level of grade that the clay comes in will depend on what is needed with the car. If it needs a massive amount of decontamination then you can go heavy, but if it’s for more everyday use or even part of a washing regime, then the softer the better.
Use tons of clay lube
Clay lube is 100% going to protect your paint from potential scratches of swirls as a result of claying your car. You could easily get a couple of cars out of one bottle, and that’s really going to town with a liberal amount. Given that you shouldn’t need to clay more than once or twice a year max, it actually offers good value.
#cars #calgary #cleaning #carwash #canada #ceramiccoating #appointment #alberta #carwash
We accept the following payments Methods: Debit, Credit card, E-transfer, Cash.
Call/text us for booking:
🌐 www.macdetailz.com
🕹 4335 Manhattan Rd SE, Calgary, AB. T2G 4B1.
☎️ +14034029804